AUDIOVOX /-
1032C Maestro
Press the power button while pressing and holding the reset switchwith the stylus, and then release the power button.
When a screen appears, release the reset switch. When initialization is completed, the Welcome screen appears. Set up the system as in the case of startup process.
ACER /-
n10/n20/n30
for the soft reset note that these model have the button in different
places (at the bottom, rear or side). To perform an hard reset you need
instead to to toggle the reset switch to the left and back to the right.
The reset switch is usually at the bottom of the devices except for n20
model for which you have to remove battery as the reset switch is
located in the right side of the battery bay.
n50
For this model to perform a soft reset use the tip of the stylus to press
the reset button inside the hole on the left side of the unit.To perform an hard reset, while holding the Today and Messaging buttons,
press the reset button inside the hole as detailed above.
n300
While holding pressed the Messaging and Today buttons in front of the
device, press the reset button into the hole at the bottom of the handheld.
ASUS /-
My PAL 620
Press and hold at the same time the button 3 (Contact) and the stylesin the "Reset" button located on the right of MyPal to access to
"BIOS" . Using the stylus press the button "Reset" and all is done.
It appears that there is another way to perform an Hard Reset on this
device. Push and hold power button and press the reset button and
all is done.
a716
This device has in the space under the battery a little switch that
you can move to disable the Backup battery. As to reach the switch
you removed the main battery, this action performs an Hard Reset.
(this is another way along with the mutiple buttons to avoid accidental
hard resets)
a730
You can use the second procedure mentioned above for the a620, I.E.
To press the power button and at the same time the soft reset button
using the stylus.
a632/a636
To perform an Hard reset press and hold the power button while
you press the tip of your stylus on the reset switch at the bottom
This will cancell all data that unit is elaborating reinstating the
device to the default setting of the watch.
To perform a Clean Boot (that really coorrespond to a true Hard Reset),
press the Speaker (-) button and at the same time the button Change
Modality and also the stylus on the reset button. This will reinstate the
device to the original default setting.
Mars II/(O2 xda Zinc)
To perform a hard reset, use the stylus to reach the reset button
found besides the device's camera button. Keep the stylus on the
reset button and press the Up Navigation button at the same time..
BENQ /-
P50
Press and hold power button. At the same time use the stylus to press
the recess Reset button. When the screen has faded off release both
buttons and when the power indicator light up green press the power
button to restart the unit.
CASIO /-
E-115/125 & EM-500
The procedure is less authomatized than the others. Remove the
CompactFlash card and power on the unit. Holding down the power
button, use the stylus to press the reset button for about 2 seconds.
You will see shown on the screen: "Proceeding with this operation
initializes memory. Press (Action) to proceed or (Start) to cancel".
Press the (Action) option to perform the Reset.
CLIE Sony /-
Connect the CLIE handheld using the AC adapter and take out the
stylus pin by twisting the upper part of the stylus. Push down and hold the power button of the unit and use the stylus
to slowly press and release the reset button on the back.
When the Palm screen will appear release the power button. At the "Erase all data?" prompt, push the upper part of the scroll
button on the front of the device to confirm OK. The Sony pda is now
reset and you have only to follow the SetUp steps as prompted.
COMPAQ /-
Aero 15xx Series
Remove both the main and backup battery, wait at least 1 minute,
then replace the batteries. (Backup Battery on the left side)
iPaq 3600, 3700 Series 36xx bottom
Press the recessed soft reset button in the hole on the bottom right
for more than 3 seconds to perform a hard reset.
You can also perform a hard reset opening the door on the bottomleft of the device and moving the switch behind the door to obtain
the same result
iPAQ H3800/H3900/5450/5500
To perform a hard reset first remove the expansion packs if any,thence turn the device on (not connected to AC power) and press
and hold two outside buttons
( 1 Calendar and 4 iPAQ Task ), also insert stylus into the reset
button at bottom of iPAQ and pressing and holding this for 5 secs.Release the above buttons in any sequence. To reactivate iPAQ, insert stylus into soft reset button or simply
connect iPaq to AC adapter.
DELL /-
Axim x5/ X3i
Another procedure a little more involved than the others.
Press and hold the Power Button thence, using the stylus press and
hold the reset button on the left side of the unit until the message
"To clear all data press the Contacts button" is shown. Press the required button located to the left of the directional pad.
When you see the message "Tap the screen to set up your Pocket PC"
execute the requested action and follow the instructions on screen
to set up your PDA again
ETEN /-
m500
Press and hold the power button and at the same time press,
using the stylus, the Reset button on the device's side.
M600 - G500
Press and hold the power button and at the same time press,
using the stylus, the Reset button on the device's side.
Release both buttons at the same time and reply YES to the
questions to cancel registry and to reinstall default settings.
X500
Hold the “Power Button” and press the “Reset Button” with
the stylus, and release both buttons simultaneously. Next,hold the End Button until the system inquiry screen is displayed,
then release the End Button and answer the question(s).
M700
Hold the Power button and press the Reset button using the
stylus. Release both buttons at the same time and next press
the 'End Button' until the inquiry screen appears. Reply to the
question.
FUJITSU-SIEMENS
Loox 400 series
Simultaneously press reset button at the bottom using stylus cap andthe Suspend/resume button on top front of the unit.After about 10 seconds a pictures will appear on th screen and a tonesounds
Loox 720 - 710
Use the point into the unscrewed stylus cap to press the soft reset
button at the bottom and at the same time press the button
suspend/resume in front right corner.After about 10 seconds, when you will see a new screen image and
you will hear an advice sound, follows the relative instruction.
Loox n500/520Take the stylus and screw it apart.Press the tip into the soft reset opening and at the same time the suspend/resume
and calendar buttonsHold the suspend/resume and the calendar button pressed for a few seconds.The reset can take a few minutes. A signal is sounded after the reset is complete.
Follow the instructions
GIGABYTE
g-Smart (i.Bond)
Press the power button on the top and on the keypad press 7 and 9
(three buttons together) It will display "formating" (Hardreset)
HANDSPRING
Hold down the power button on the front panel of your handheld.
Holding down the power button, press the reset button by paper clip.
As soon as you see the logo on the screen, release the power button.
Press the up scroll button on the front panel to perform a hard reset
or press any other button to perform a soft reset.
You can restore backed up data by performing a HotSync operation.
HP /-
Jornada 520, 525, 540, 545, 547, and 548
Press and hold the soft reset button and press the power button.
Jornada 564, 565, 567, and 568
Perform a soft reset using the button on the back of the device,thence remove the main and backup battery for some minutes.
(The backup battery is locked on the left side of the device)
iPaq 19xx Series
These devices can be hard reset by pressing and holding the soft
recessed button on the left-hand side of the device while you are
pressing and holding the power button at the top the unit. Keep buttons pressed for several seconds until the screen fades.
iPaq 22xx Series
Press and hold Buttons 1 (Calendar) and 4 (iTask) on the front of
the device and, at the same time, press the Reset button on the
back of the Pocket PC using the device's stylus.
Hold thel buttons until the screen begins to fade (about 3/4 secs).
Release the buttons and stylus.
If the device PC has been fully reset, it does not power on and you
must reactivate its battery connecting the same to the AC power
or pressng the usual soft reset button with the stylus.
Note: The iPAQ 19xx & 22xx series have a feature called "iPAQ File Store" allowing to store some data and programs in
the Flash ROM. If you used this option, the hard reset will not cancel the data stored therein. Moreover if this area
become garbled you risk to have to reflash the Rom.
Do not store date exceeding its storage's space.
iPaq 41xx Series
Press and hold the Power button and at the same time press Reset
button in the device's back using the stylus.
Release first the power button , thence the Reset button and you will
see the device to reset and to power on again with original setting.
iPaq rz17xx, rx31xx, rx34xx, rx37xx series
Press and hold the extreme left button (Mobile Media) and the extreme
right button (iTasks) at the same time and use the stylus to press the
reset button at the bottom of the unit. When the screen fades release
the two buttons and button under the stylus. If the unit does not power
on authomatically perform a simple soft reset.
iPaq hx4700
Press and hold calendar and iTask buttons in the front area, while, holding down the buttons, press using the stylus the reset button onthe bottom for about 2 seconds.
iPaq hx2750press and hold button 1 and 4 on the front of the device and at the same time use the stylus to press reset button on the bottom of the ipaq.
iPaq h6300
Press and hold the Power button for about 3 seconds while at the same
time you press by the stylus the reset button on the left side of the unit.
When the screen blanks release both the buttons and wait that the device
powers on.
iPaq rx1950
To perform a clean reset and return you HP iPAQ to factory settings press
and hold the calendar and the iPaq Wireless buttons. While holding down
the buttons lighttly press the Reset button by the stylus for about 2 seconds.
When the HP iPAQ screen begins to fade, release the two first buttons and
then remove the stylus. Plug the device into AC adapter o press Reset button
again to restart unit.
hx2000 series (not h2210)
Press and hold down Calendar and iTask buttons. While holding down these
buttons, use the stylus to press the Reset button on the bottom of the iPAQfor about two seconds. When the Pocket PC screen begins to fade, release thementioned two buttons first, and then remove also the stylus from the Reset.
hw6500 series
To perform a hard reset hold down the Power button and use the stylus to
press the recessed Reset button on the bottom for about five seconds.
The screen fades and the device resets. Once the device resets and the screen
comes back on, release the Power button and remove the stylus from the Reset.
hw69xx series
To perform an Hard(clean) Reset press and hold the Answer/Send, Power,
and End Call buttons. While holding these buttons, by the stylus press the Reset
button on the bottom of the iPAQ until the device restarts.3.When the HP iPAQ restarts, release all of the buttons, Reset button included.
HTC
(qTek 2020-9090-S100 e Xda-Mda-O2-iMate) etc)
Press and hold the power button and use the stylus to press the softreset button at the bottom of the unit at the same time
HTC Wizard(qTek 9100 e i-Mate K-Jam, O2..) etc
Press and hold the Comm.Manager button along with Voice Command button.
While pressing the two button on the device, use the stylus to press and hold
the reset button on the side.
HTC Prophet (Qtek S200,Imate JASmin etc)
Press and hold the CAMERA and COMM MANAGER buttons, and use thestylus to press the RESET button. Holds the CAMERA and COMM MANAGER
buttons until the following message is displayed: “Press Send to restore
factory default or press other key to quit.
HTC TyTN(Hermes,Qtek9600,JasJam etc)
Always switch off the device before to execute a full reset. The full reset
is the Hard Reset of the device an to execute it push and hold at same time
both the SoftKey left and right on the front of the unit while you use the
stylus to press the soft reset button at the bottom of the device.
HTC Universal(qTek 9000 e i-Mate JasJar, Mda Pro..) etc
Press with the fingers the two keys at the same
time and keep them pressed. In addition by the stylus
press the pin into the RESET opening on the back of thedevice. Thence pressing 0 button confirm the Hard resetor, using 'x', choice to not perform the Hard Reset.
(be careful to execute an hard reset under WM 5.0 read device's manual before)
HTC P3300 - P3600
Press and hold left and right buttoni - SOFTKEY and using the stylus
press the RESET command of the device.
Release the stylus, but hold the above buttons and release them when
the screen shows the following message:“Press SEND to restore manufacturer default, or press ..................”
Now you can press the required button (green call icon)
MITAC /-
Mio P350/P550
You can go back to the factory default executing an hard reset from
Start-> Settings-> SysInfo-> Clean Boot
The display will show two methods:
Method 1:It will clean all data. Include Mio Map.Method 2:It will clean all data, except Mio Map.
Mio a701
Make sure that A701 is turned off then press and hold at the same time
the Down Volume button and the End button. When the unit start to
vibrate you can release both buttons. The unit will turn on automatically
and it will show the Setup Wizard. Follow the instructions to complete the
operation
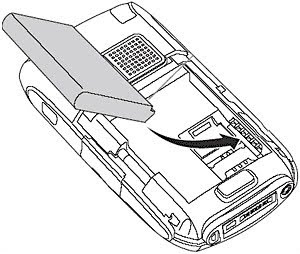
Mio a201
Remove the battery cover by pressing and then sliding the cover off.Use the stylus to slide the ON/OFF switch to the ON (left) position .
(ON to OFF , then OFF to ON)Install the battery and immediately press the Record Button. The screen will show "cold boot" and "loading......"At this time, you must replace the battery cover.
Mio 168
Close all the running programs.
On the rear of the unit slide the battery switch to OFF.
After about 1 minute return the switch on the ON position.
The unit will restart with the original settings.
NEC /-
MobilePro P300
Hold the Power and Record buttons down and insert your stylus into thereset hole.
PALM /-
To perform a soft reset on a Palm (Handspring also) device find the
reset button located in a hole on the back of the device. Using the tool in your stylus, or some other object such as a paperclippress reset button inside the hole.
There is also another form of Reset: Warm Reset A warm reset bypasses any system extensions (such as HackMaster
hacks, operating system patches, and so on) that are loaded on the
device. A warm reset often bypass the "boot loop" error, allowing
you to remove applications, previously installed, causing problems.
All stored data in the device remain unchanged with a warm reset.
To perform a warm reset hold down the top scroll button and press
the reset button inside the hole on the back of your unit.
When in the Palm display you see the general preferences screen,
release the top scroll button.
After a warm reset, you may need to perform a soft reset to get the
device working as normal.
Performing a hard reset you start everything over from scratch.
Be sure to back up your files first.
Perform a hard reset only if a soft or warm reset does not solve
your problem.
To perform a hard reset hold down the power button (Wireless Mode
button on the Treo 600) and press the reset button on the back panel.
When the Palm screen appears, release the power button.
You will get a message informing that you are about to erase all your
data. To continue, press the top scroll button.
To cancel, press any other button. In this case you will get a soft
reset only.
After a hard reset calibrate the digitizer and verify time & date.
QUANTA /-
xda Atom
Press and hold the power button, and then use the stylus topress the soft reset button at the same time.
TREO palmOne /-
Treo650
Remove battery cover and find the Reset hole beside the battery (without
removing the battery). Press and Hold down the Power/End button and
using the stylus press and release the RESET button in the hole.
Release the Power/End button when the Palm Powered logo appearsand when you will be asked if you wish to remove all data press the Up
button to confirm the Hard Reset.TOSHIBA /-
Toshiba E310
Slide the white switch on the bottom left to the left for a few seconds.The manual says depress the power button at the top with the stylus inthe hole in the back and release the power button.
Toshiba E740Slide the white switch at the bottom of the device to the right for few seconds, thence slide it back.
Toshiba e800/805
Use the stylus to move to the right the switch under the rubbercover that you find above the wifi switch on the bottom of device. After few seconds reinstate switch to original position.
MEAN SOFT RESET !!!
Soft Reset
A soft reset tells to your device to stop what it is doing and to restart.
All records and programs stored in device will be retained after a soft reset.
After resetting, the usual start screen will appear.
Use a soft reset when your device seems to have crashed or hanged.
This type of reset is the first to try, before any others, to solve the above problems.
This kind of reset is, usually, well known by the user and really easy to perform.
Hard Reset (or Full Reset)
Performing a hard reset, all settings, records and programs stored in the Pda
(except the ones stored in Rom) will be erased.
After a Hard Reset formats, preferences, and other settings will be restored
to the factory default settings.
You can restore any previous data if you got a Backup of your device before
the hard reset otherwise you will need to reinstall any third-party applications.
If you are hard resetting your device owing to some hard problem i suggest
to restores installed applications without using the backup if you are not sure
that backup data do not include the problem you wish to solve also. In few words a hard reset allows you to start everything over from scratch.